VirtualBox上安装Debian10个人备忘笔记
VirtualBox
下载链接:Downloads – Oracle VM VirtualBox,下载完成后安装即可。
Debia
下载链接:通过 HTTP/FTP 下载 Debian CD/DVD 映像
下载说明:
从下载页面可以看到有两个介质的下载,如果你希望最大限度的离线安装的话,可以选择DVD版本
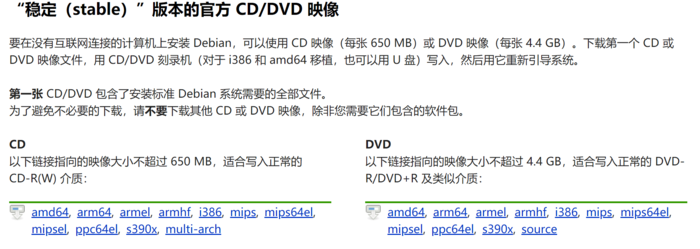
这里本人选择CD介质中的amd64,进入后会看到下方有一系列的ISO,到底该下载哪个呢?其实在DVD介质页面里面已经给了说明:
There are lots of files here! Do I need all of them?
In most cases it is not necessary to download and use all of these images to be able to install Debian on your computer. Debian comes with a massive set of software packages, hence why it takes so many disks for a complete set. Most typical users only need a small subset of those software packages.

Initially, you will only need to download and use the first image of a set (labelled as debian-something-1 to be able to start the Debian installer and set up Debian on your computer. If there are more images available here (labelled debian-something-2, debian-something-3, etc.), they contain the extra packages that can be installed on a Debian system (as mentioned previously). They will not be bootable and are entirely optional. If you have a fast Internet connection, you're most likely better off installing any desired extra packages directly from the Debian mirrors on the Internet instead of by using these extra images.
简而言之,下载Debian-XXX-1.iso的即可,其他的都是可选包,可以通过网络下载。
安装过程 VirtualBox
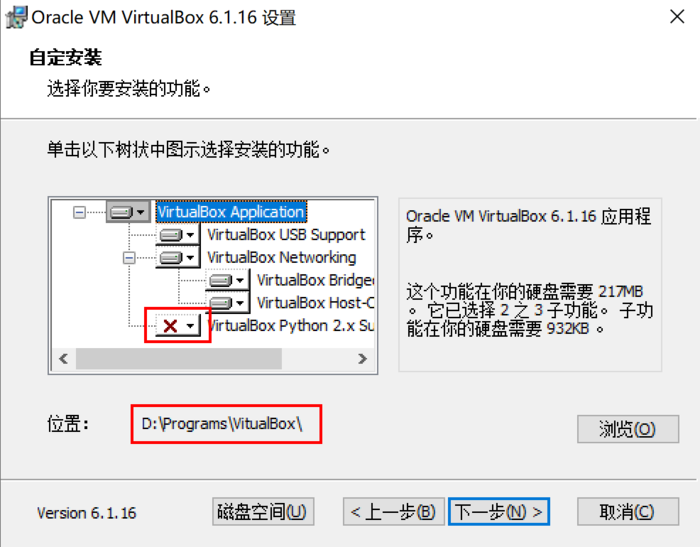
VirtualBox的安装没有什么特殊的处理,Python的支持可以去掉,然后安装路径按需放置。
安装完成后,进入VirtualBox创建一个新的虚拟机:Machine -> New
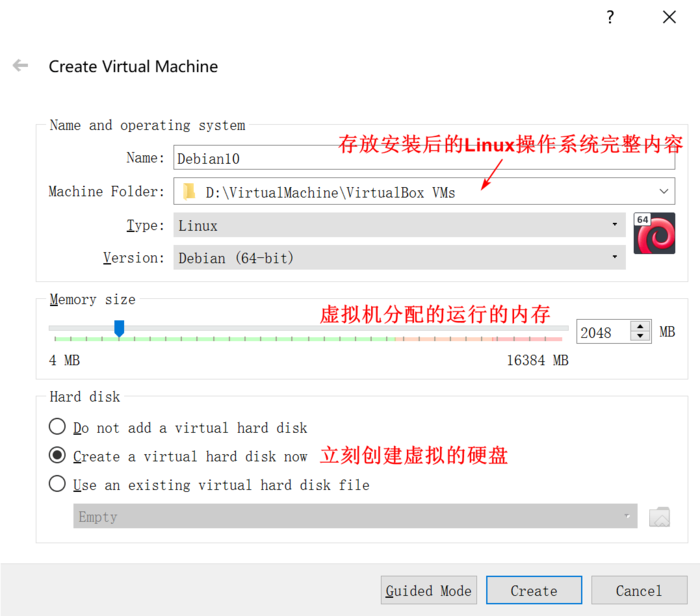
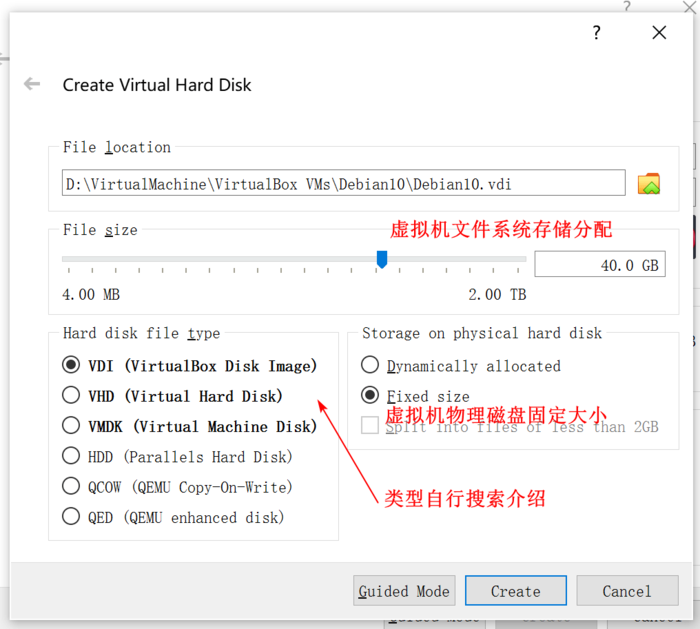
接下来的进行Create,等待VirtualBox进行虚拟机的磁盘存储等初始化操作。这个过程的处理时间取决于工作电脑的处理器和磁盘类型。
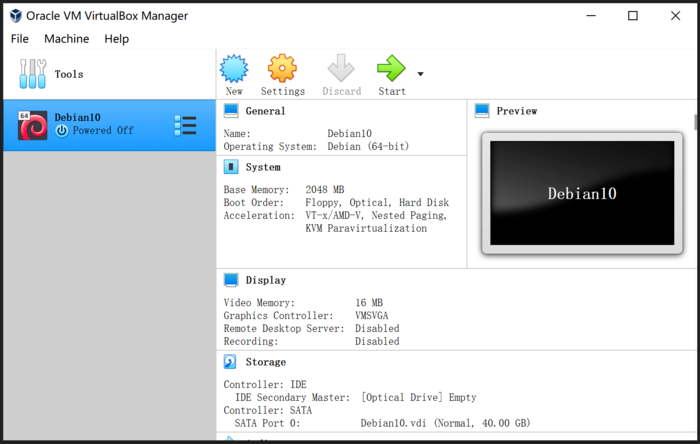
Debian 启动并选择镜像
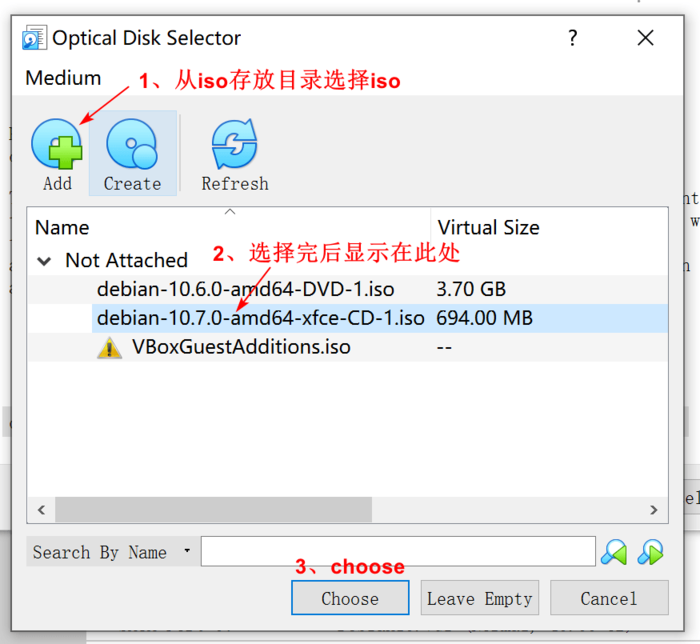
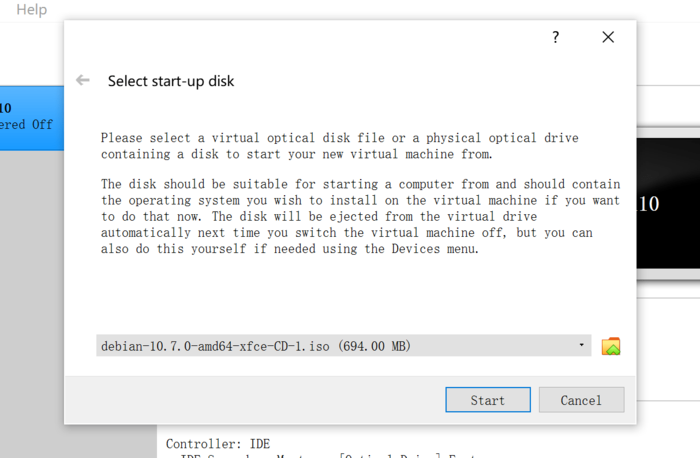
一系列的安装过程
由于步骤很多,详情可以参考这篇很有用的知乎文章:图解 Debian 10(Buster)安装步骤 - 知乎 (zhihu.com)
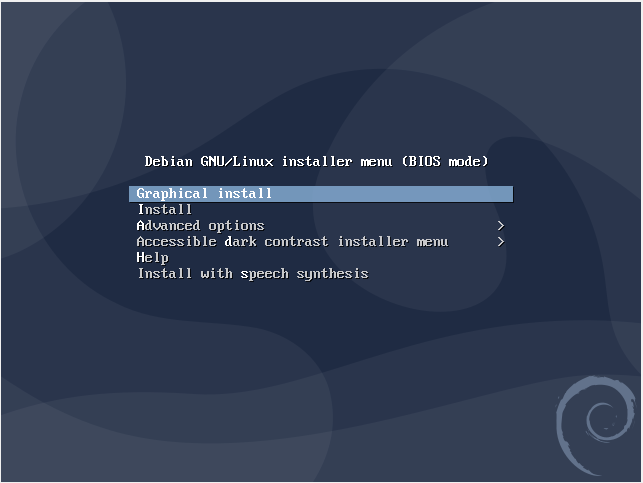
环境初始化 添加用户到sudoer
# 1.切换到root用户
$ su

# 2.编辑sudoer文件
$ vi /etc/sudoers

# 3.在User privilege specification一行复制root对应的内容,添加一行当前用户的记录,内容为
w4ngzhen(你的用户名,本人使用的w4ngzhen) ALL=(ALL:ALL) ALL

# 4.强制保存

# 5.退出root用户
$ exit
udo方式修改apt源
实际上该步骤可以在上述安装Debian的时候就可以选择镜像完成配置,这里写出来主要是为了方便以后查阅修改镜像。
# 1.编辑apt源配置文件
$ sudo vi /etc/apt/sources.list

# 2.添加国内能快速访问的镜像源,这里选择腾讯。修改完成后,保存退出到命令行
deb http://mirrors.cloud.tencent.com/debian/ buster main non-free contrib
deb http://mirrors.cloud.tencent.com/debian-security buster/updates main
deb http://mirrors.cloud.tencent.com/debian/ buster-updates main non-free contrib
deb http://mirrors.cloud.tencent.com/debian/ buster-backports main non-free contrib
deb-src http://mirrors.cloud.tencent.com/debian-security buster/updates main
deb-src http://mirrors.cloud.tencent.com/debian/ buster main non-free contrib
deb-src http://mirrors.cloud.tencent.com/debian/ buster-updates main non-free contrib
deb-src http://mirrors.cloud.tencent.com/debian/ buster-backports main non-free contrib

# 3.更新apt源
$ sudo apt-get update

# 4.更新apt已安装包
$ sudo apt-get upgrade
安装linux-header
# linux-headers的版本需要与当前内核发行版一致,查看内核发行版本命令如下:
$ uname -r
# 本人机器输出:4.19.0-9-amd64
# 所以需要安装的linux-headers为:linux-headers-4.19.0-9-amd64,这里使用shell命令便捷操作
$ sudo apt-get install -y linux-headers-$(uname -r)
安装gcc、make、perl等
$ sudo apt-get install -y gcc make perl问题及解决 VBox启动Debian/Xfce图形界面黑屏 原因1:VBox虚拟机【设置】-【显示】中启用了3D加速 解决方式:关闭3D加速
- 上一篇:Zim学习笔记(Fedora)
- 下一篇:nginx之proxy_pass详解